
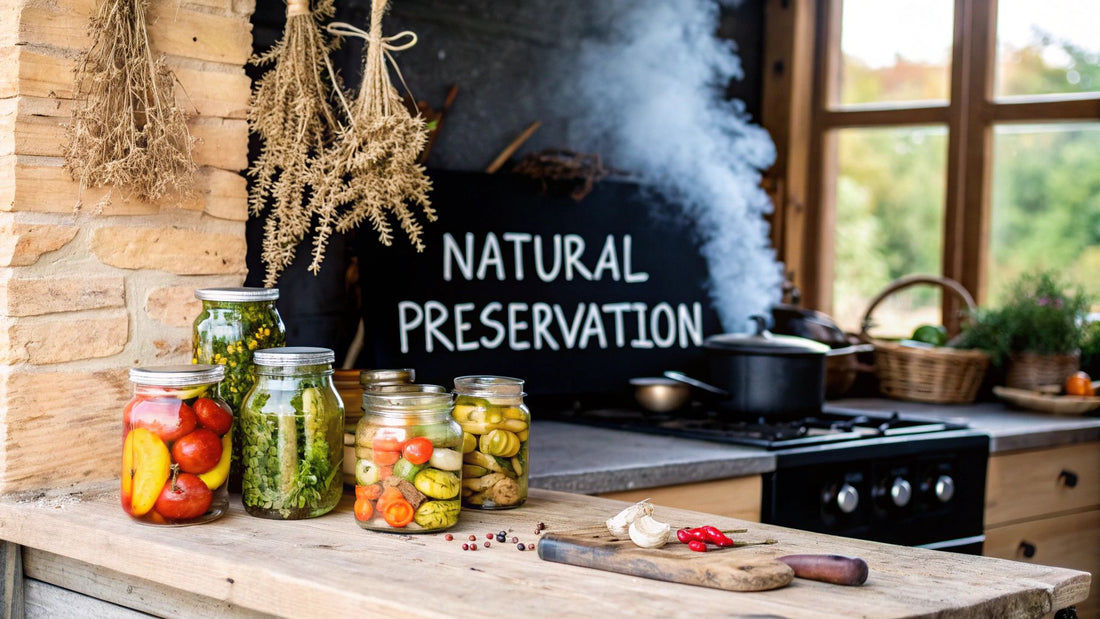
Natural Food Preservation: Timeless Techniques for Freshness
Why Ancient Natural Food Preservation Still Rules Today
Our ancestors, lacking refrigeration and chemical preservatives, developed ingenious methods to preserve food. Using resources like salt, sun, smoke, and even beneficial bacteria, they extended the life of their harvests, ensuring survival and community prosperity through lean times. Surprisingly, these techniques are experiencing a resurgence in popularity today.
The Allure of Natural Preservation
Many modern consumers see natural preservation as a welcome alternative to commercially processed foods filled with artificial additives. Growing awareness of the potential health impacts of these chemicals fuels this preference. Moreover, natural preservation empowers individuals to take control of their food supply, lessening reliance on industrially produced goods. This shift toward greater self-sufficiency appeals to those seeking healthier, more sustainable lifestyles.
This desire for control also extends to lessening our environmental footprint. Consider the sheer volume of plastic packaging used in commercial food preservation. Natural methods, often relying on reusable jars and minimal packaging, offer a greener alternative. Fermenting vegetables in a glass jar, for instance, dramatically reduces waste compared to buying pre-packaged pickles in plastic.
A History As Old As Civilization Itself
Natural food preservation has deep roots, dating back to prehistoric times. Evidence suggests Middle Eastern and Oriental cultures dried foods as early as 12,000 B.C. This method used the sun or wind to dehydrate food, allowing for long-term storage and enabling communities to establish stable food supplies. Variations evolved over time, such as building fire-heated 'still houses' to dry foods in areas with limited sunlight or wind. Learn more about the history of food preservation here.
The Modern Relevance of Ancient Wisdom
From dehydration to fermentation, these ancient techniques remain remarkably effective. Dehydration removes moisture, inhibiting microbial growth and transforming fresh produce into shelf-stable goods. Fermentation, meanwhile, uses beneficial bacteria to create probiotic-rich foods like sauerkraut and kimchi. These aren't just preserved foods; they're enhanced foods with distinct flavors and health benefits.
These methods offer more than just preservation; they provide unique culinary experiences. Consider the smoky depth from traditional smoking or the complex tanginess developed through fermentation. These flavors are difficult, if not impossible, to replicate with modern processing. This renewed interest in natural preservation reflects a desire for both healthier food and more authentic flavors. It's a return to basics, a rediscovery of our ancestors' simple yet profound wisdom.
The Science Behind Natural Food Preservation Success
Natural food preservation is more than just a set of useful techniques. It's rooted in scientific principles that explain why these methods are so effective. Understanding these principles allows you to preserve food safely and with confidence. This involves understanding how these methods inhibit microbial growth, the primary cause of spoilage.
The Role of Microorganisms
Microorganisms are at the core of natural food preservation. These tiny organisms, including bacteria, yeasts, and molds, are the main culprits behind food spoilage. For example, when fruit rots, it's because these microorganisms are breaking down the fruit's sugars and releasing gases. This leads to the unpleasant textures and smells we associate with spoiled food. Natural preservation methods create environments that are hostile to these microorganisms, effectively preventing them from thriving and causing spoilage.
The Importance of pH and Water Activity
Two key factors influencing microbial growth are pH and water activity. pH measures how acidic or alkaline a food is. Most microorganisms thrive in neutral pH environments. Preservation methods like pickling, which use vinegar, create highly acidic environments that prevent microbial growth.
Water activity, on the other hand, measures the amount of unbound water available for microbial growth. This means that even if a food contains water, if that water is bound to other molecules, it’s unavailable for microbial use. Methods like drying and salting reduce water activity, making it difficult for microorganisms to grow.
Bridging Ancient Wisdom and Modern Science
The connection between traditional methods and scientific understanding wasn’t always clear. For generations, these techniques were passed down through practical experience, not scientific analysis. However, a significant change occurred during the early 1800s, notably during the Napoleonic Wars.
French chemist Nicolas Appert made a groundbreaking discovery by heating food in tightly sealed containers, successfully preserving it. This innovation addressed the nutritional deficiencies of salt-preserved meats and the prevalence of scurvy among soldiers. Building on Appert’s work, Louis Pasteur further advanced preservation methods through his research on the link between microorganisms and food spoilage. Discover more insights about this topic here. These discoveries validated and explained the science behind many long-standing preservation practices, transforming them from trial-and-error approaches into reliable, science-backed methods.
Key Principles in Natural Food Preservation
Several key principles are used in natural food preservation, each targeting different aspects of microbial growth:
-
Inhibiting Microbial Growth: Creating environments where microorganisms cannot survive or reproduce. This is achieved through methods like fermentation, where beneficial bacteria create an acidic environment, or by reducing water activity through dehydration.
-
Removing or Destroying Microorganisms: Eliminating existing microorganisms to prevent spoilage. Canning achieves this by using heat to destroy bacteria.
-
Slowing Down Enzymatic Activity: Enzymes naturally present in food can cause undesirable changes in texture and flavor. Cold preservation techniques, like refrigeration and freezing, slow down enzymatic activity, preserving food quality.
By understanding these fundamental principles, you can approach natural food preservation with greater confidence and ensure the safety and quality of your preserved foods. This knowledge empowers you to adapt traditional methods to your own needs and preferences, making natural food preservation a practical and rewarding part of a sustainable lifestyle. Additionally, this foundation will allow you to experiment with various techniques and ingredients, understanding the underlying science behind your efforts.
Your Complete Guide to Natural Food Preservation Methods
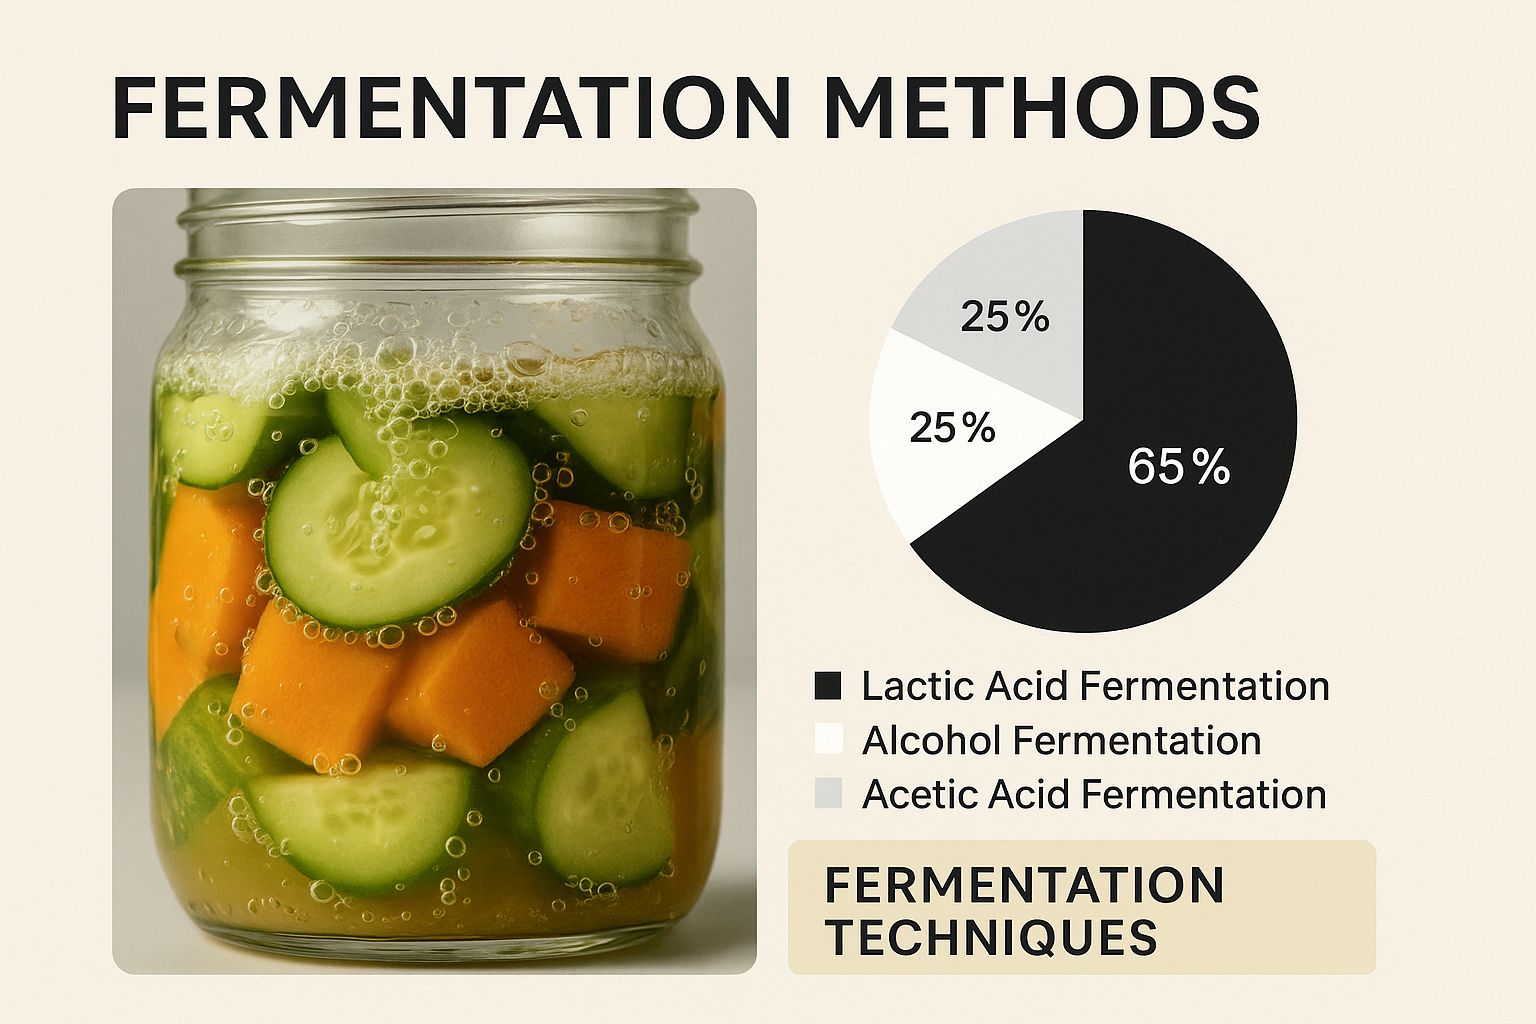
This image showcases vegetables actively fermenting in a jar. The bubbling and the "Fermentation Techniques" text highlight the dynamic nature of this process. Fermentation is clearly a powerful way to transform and preserve food. The visual also emphasizes how simple natural food preservation can be, even for more complex methods.
Dehydration: Preserving Food Through Drying
Dehydration, one of the oldest preservation methods, removes moisture from food, preventing microbial growth. This simple technique turns fresh produce into shelf-stable goods ideal for long-term storage. It works especially well with fruits, vegetables, and herbs, effectively maximizing their shelf life without the need for refrigeration. Dried herbs, for instance, can retain their flavor and potency for months, adding a burst of freshness to your dishes year-round.
Fermentation: Utilizing Beneficial Bacteria
Fermentation transforms food using beneficial bacteria. These bacteria convert sugars into acids or alcohol, creating an environment that hinders harmful microorganisms. This process not only preserves food but also boosts its nutritional value. Sauerkraut and kimchi are excellent examples of fermented foods packed with probiotics, offering a variety of health benefits. Fermentation also develops unique and complex flavors that enrich any meal.
Salt Curing and Smoking: Time-Honored Techniques
Salt curing uses salt to draw out moisture, effectively inhibiting microbial growth. This method imparts distinctive flavors and textures, particularly to meats and fish. Smoking, often combined with salt curing, adds another layer of preservation and flavor. The smoke from burning wood acts as a protective shield, further extending shelf life. However, careful monitoring of temperature and smoke levels is crucial for food safety.
Choosing the Right Preservation Method
Selecting the right method depends on several factors. Consider the type of food, your available equipment, and desired storage duration. Dehydration is a great choice for herbs and fruits, while fermentation is perfect for vegetables. Understanding the strengths of each method empowers you to make informed choices.
To help you choose the best method for your needs, let's compare some popular natural preservation techniques:
Natural Preservation Methods Comparison
This table compares different natural food preservation techniques, their effectiveness, shelf life extension, and best applications.
| Method | Shelf Life Extension | Best Foods | Equipment Needed | Difficulty Level |
|---|---|---|---|---|
| Dehydration | Several months to a year | Fruits, vegetables, herbs, mushrooms | Dehydrator, oven, or sun drying racks | Easy to Moderate |
| Fermentation | Weeks to months | Vegetables (cabbage, cucumbers, carrots), fruits, dairy | Jars, weights, airtight lids | Easy to Moderate |
| Salt Curing | Weeks to months | Meats, fish, some vegetables | Salt, containers, weights | Moderate |
| Smoking | Weeks to months | Meats, fish, cheeses | Smoker, wood chips | Moderate to Difficult |
This table highlights the varying shelf life extensions and equipment needs for each method. While dehydration and fermentation are generally considered easier, smoking and salt curing may require more specialized equipment and expertise.
These diverse methods offer numerous ways to preserve food naturally. Whether your goal is to reduce food waste, enjoy seasonal produce year-round, or create unique flavors, exploring natural food preservation is a rewarding experience. These techniques connect us to the wisdom of past generations and deepen our relationship with food.
Mastering Dehydration and Drying at Home
Dehydration is one of the most accessible methods for preserving food naturally. Once you’ve mastered the technique, you’ll unlock a wealth of benefits. From trimming grocery bills and reducing food waste to enjoying wholesome snacks all year round, dehydration gives you control over your food supply. This guide will take you through the entire process, from choosing the right foods to storing your dried goods for maximum shelf life.
Selecting and Preparing Food for Dehydration
Not all foods dehydrate at the same rate. Fruits and vegetables with high water content, such as berries, tomatoes, and leafy greens, are particularly well-suited for dehydration. Herbs, mushrooms, and even meats can also be dehydrated, extending their usability and enriching your culinary creations. Proper preparation is essential. Wash produce thoroughly, peel if necessary, and slice uniformly for even drying.
Uniform slicing not only ensures even drying but also influences the final product’s texture and how well it rehydrates. Think of it like baking a cake: even layers cook more consistently.
Dehydration Methods: From Air to Electricity
You can use several methods to dehydrate food at home. Air drying is the simplest method, relying on natural airflow and sunlight to remove moisture. However, this method can be time-consuming and is dependent on favorable weather conditions. Oven drying offers more control, using the oven's low heat setting for faster dehydration. For consistently excellent results and greater efficiency, an electric dehydrator is a worthwhile investment. These appliances offer precise temperature control and consistent airflow, both vital for optimal dehydration.
Optimal Temperatures and Timing
Maintaining the right temperature is key to successful dehydration. Too low, and the drying process takes too long, potentially spoiling the food. Too high, and the food can become case hardened, where the outside dries too quickly, trapping moisture inside. A temperature range of 125-140°F (52-60°C) is generally recommended for most fruits and vegetables.
Drying times vary based on the type of food, the thickness of the slices, and the humidity. Research indicates that properly dehydrated foods retain 80-95% of their original nutritional value, with shelf life extended by 8-12 months when stored correctly. This makes dehydration a very effective way to preserve both nutrition and food security. Learn more about the nutritional benefits of dehydration here.
Recognizing and Storing Perfectly Dried Foods
Properly dried foods should feel leathery or brittle, without any remaining moisture. To test, try bending a piece; it should snap cleanly rather than bend. Proper storage is critical for preserving quality. Airtight containers, such as glass jars or resealable bags, stored in a cool, dark, and dry environment are ideal. This prevents moisture reabsorption and protects against pests. Using oxygen absorbers in your storage containers can further extend shelf life by removing any residual oxygen.
Troubleshooting Common Dehydration Problems
Even seasoned dehydrators run into occasional problems. Uneven drying can happen when slices are inconsistent in thickness or trays are overcrowded. Rotating trays and ensuring proper spacing can resolve this. Case hardening, as mentioned earlier, results from high temperatures. Lowering the temperature and monitoring the process carefully helps prevent this.
By understanding these common issues and their solutions, you can achieve consistently perfect results. With practice and attention to detail, dehydration becomes a simple and rewarding way to preserve the bounty of your garden or the farmer's market.
Fermentation: Your Gateway to Probiotic Powerhouses
This image showcases the vibrant transformation vegetables undergo during fermentation. It’s a simple process with powerful results, moving beyond mere preservation to create something new and beneficial. This visual highlights how accessible this natural preservation method truly is.
Fermentation is a natural way to preserve food, extending its shelf life and boosting its nutritional value. It also creates unique flavors. Unlike methods like dehydration or canning, fermentation uses beneficial bacteria. These probiotic powerhouses, mainly Lactobacillus bacteria, convert sugars into acids or alcohol, creating an environment that prevents harmful microorganisms from growing.
Lacto-Fermentation: The Foundation of Fermented Foods
Lacto-fermentation is the most common way to ferment vegetables. It uses naturally occurring Lactobacillus bacteria. These bacteria consume the sugars in the food, producing lactic acid. This lactic acid creates the tangy flavor characteristic of fermented foods. It also acts as a natural preservative. Think of the sour taste of sauerkraut or kimchi – that’s lactic acid in action.
Creating the Perfect Environment for Beneficial Bacteria
Successful fermentation depends on creating the right environment for beneficial bacteria to thrive while suppressing unwanted microbes. This involves controlling a few key factors:
- Salt Concentration: The correct amount of salt stops harmful bacteria from growing while allowing Lactobacillus to flourish. Too little salt can spoil the food, while too much can hinder fermentation.
- Temperature: Lactobacillus prefers a warm environment, ideally between 60-75°F (15-24°C). Temperatures outside this range can slow down fermentation or encourage unwanted microorganisms.
- Anaerobic Conditions: Fermentation needs an anaerobic environment – one without oxygen. This prevents mold and encourages Lactobacillus activity. Tools like airlocks can help maintain these conditions.
Simple Fermentation Recipes for Your Kitchen
You don't need special equipment to ferment foods. Start with basic kitchen tools and easy recipes:
- Sauerkraut: Shredded cabbage, salt, and time are the key ingredients for this probiotic-rich food.
- Kimchi: This Korean staple combines fermented vegetables like cabbage and radishes with a paste of garlic, ginger, and chili peppers.
- Pickles: Fermented pickles offer a tangy alternative to vinegar-based pickles, plus the added benefit of probiotics.
Recognizing Successful Fermentation vs. Spoilage
Distinguishing between successful fermentation and spoilage is essential for food safety. Fermented foods will have a pleasant sour aroma and taste. Spoilage is marked by off-putting smells like mold or a slimy texture. Studies show fermented foods contain 10-100 times more beneficial bacteria than probiotic supplements, with homemade fermented vegetables having the greatest diversity. Learn more here.
Troubleshooting Common Fermentation Issues
Fermentation, like any skill, takes practice. Here are some common issues and solutions:
- Kahm Yeast: A harmless white film can form on the surface. Simply skim it off.
- Mold: Mold growth signals a problem with the anaerobic environment or sanitation practices.
- Soft or Mushy Texture: This can result from not enough salt, high temperatures, or using the wrong type of salt.
By understanding the science behind fermentation and using the right techniques, you can create a variety of delicious and probiotic-rich foods at home. This time-honored practice demonstrates the power of natural processes, offering a rewarding way to preserve and improve your food.
Salt Curing and Smoking for Incredible Flavors
Salt curing and smoking are two powerful food preservation methods. They not only extend shelf life but also significantly enhance flavor. Practiced for centuries, these techniques allow you to create restaurant-quality preserved foods at home. Let's explore the intricacies of each method and discover how they transform ordinary ingredients into culinary masterpieces.
The Magic of Salt Curing: From Dry Rubs to Brines
Salt curing essentially uses salt to draw moisture out of food. This creates an environment that inhibits microbial growth. While the concept is simple, a variety of techniques exist, each producing unique flavor profiles and textures.
-
Dry Curing: This method involves rubbing a mixture of salt and spices directly onto the food. The salt extracts moisture, allowing the spices to infuse the food with complex flavors. Dry curing is particularly effective for meats like prosciutto and pancetta, imparting a deep flavor and firm texture.
-
Wet Curing: Also known as brining, this technique submerges the food in a solution of salt, water, and other flavorings. Wet curing is often used for poultry and fish, creating succulent, flavorful meat that stays moist even after cooking. Think of a juicy, flavorful Thanksgiving turkey achieved through brining – a testament to the power of wet curing.
The type of salt used significantly impacts the final result. Table salt, while readily available, may contain anti-caking agents that can affect the flavor. Kosher salt, with its larger crystals, is often preferred for its clean taste. For a more nuanced flavor, consider specialty salts like pink Himalayan salt or sea salt.
The Art of Smoking: Hot vs. Cold
Smoking infuses food with the flavor of burning wood while also inhibiting microbial growth. Like salt curing, smoking offers different approaches suited to specific foods:
-
Hot Smoking: This method uses higher temperatures (120-180°F/49-82°C) to cook food while simultaneously smoking it. Often used for fish and poultry, hot smoking results in fully cooked, smoky dishes. It's quicker than cold smoking and produces food that's ready to eat.
-
Cold Smoking: This method exposes food to lower temperatures (below 86°F/30°C) for an extended period. Cold smoking, often used for cheeses, fish (like salmon), and some meats, creates a distinct smoky flavor without cooking the food. This process requires careful temperature control to prevent bacterial growth.
Wood Selection and Flavor Profiles
The type of wood you use drastically affects the final flavor. Hickory, for example, imparts a strong, bacon-like flavor, while applewood provides a milder, sweeter taste. Experimenting with different woods like mesquite, cherry, and pecan allows you to craft unique flavor profiles.
To help you choose the right wood for your next smoking project, we've put together a handy guide:
Salt Types and Smoking Woods Guide: Comprehensive guide to different salts for curing and wood types for smoking, including their flavor profiles and best applications
| Material Type | Flavor Profile | Best Applications | Processing Time | Special Notes |
|---|---|---|---|---|
| Kosher Salt | Clean, pure | All-purpose curing | Varies depending on application | Preferred for its lack of additives |
| Pink Himalayan Salt | Mineral, slightly earthy | Red meats, charcuterie | Varies depending on application | Adds a unique color and subtle flavor |
| Sea Salt | Briny, nuanced | Fish, poultry | Varies depending on application | Flavor intensity varies depending on origin |
| Hickory Wood | Strong, bacon-like | Ribs, pork shoulder | 4-12 hours (hot smoking) | Can be overpowering if used excessively |
| Applewood | Mild, sweet | Chicken, fish | 2-6 hours (hot smoking) | Complements lighter meats well |
| Mesquite | Earthy, bold | Brisket, game meats | 6-12 hours (hot smoking) | Adds a distinct Southwestern flavor |
| Cherry Wood | Sweet, fruity | Pork loin, salmon | 3-8 hours (hot smoking) | Pairs well with fruit glazes |
| Pecan | Nutty, sweet | Turkey, ham | 4-10 hours (hot smoking) | Offers a balanced sweetness |
This table provides a quick reference for common curing salts and smoking woods. Processing times are estimates and can vary based on the specific food and desired outcome.
Smoking Setups for Every Home
Whether you have a large backyard or a small apartment, a smoking setup exists for you. From basic stovetop smokers with wood chips to elaborate outdoor smokers, you can adapt the technique to your space and resources.
-
Stovetop Smoker: A simple and budget-friendly option for limited spaces.
-
DIY Smoker: Build your own smoker using a metal drum or terracotta pot for a cost-effective solution.
-
Electric Smoker: Convenient and user-friendly, providing precise temperature control.
-
Offset Smoker: Traditional smokers ideal for larger quantities and developing more complex flavor profiles.
Salt curing and smoking are powerful techniques that transform ordinary ingredients into extraordinary culinary experiences. Understanding the nuances of each method allows you to enjoy flavorful, naturally preserved foods. These methods require attention to detail and adherence to safety guidelines. Always prioritize food safety by monitoring temperatures, using proper curing salts, and storing your creations correctly. With practice and patience, you will master these techniques, adding depth and complexity to your cooking.
Safety First: Essential Guidelines for Home Preservation
Preserving food at home offers a fantastic way to enjoy seasonal flavors year-round and reduce food waste. However, safety should always be your top priority. Improper preservation techniques can create health risks, negating the benefits of your hard work. This section outlines crucial safety protocols to ensure your preserved foods nourish your family. By understanding and implementing these guidelines, you'll confidently and safely preserve food at home.
Understanding pH, Water Activity, and Temperature Control
Microbial growth is the primary cause of food spoilage. Controlling the factors that influence this growth forms the basis of safe preservation. pH, a measure of acidity or alkalinity, plays a vital role. Harmful bacteria thrive in neutral pH environments. Preservation methods like pickling create a high-acid environment, inhibiting bacterial growth.
Water activity measures the available water that supports microbial growth. Reducing water activity through methods like drying or salting limits microbial proliferation. Think of it this way: even if water is present, if it's bound to other molecules, bacteria can't access it, effectively stopping their growth.
Temperature control is also critical. High temperatures in canning destroy harmful microorganisms, while freezing temperatures slow down microbial growth and enzymatic activity. Each preservation method utilizes specific temperature ranges to guarantee both safety and quality.
Sanitization and Equipment Maintenance: Preventing Contamination
Proper sanitation is essential for safe preservation. Contaminated equipment can introduce unwanted microorganisms. Before starting any preservation project, thoroughly wash all jars, lids, and utensils. This significantly reduces spoilage risk.
Regular equipment maintenance is equally important. Inspect jars for cracks or chips, and replace any damaged lids. A compromised seal allows bacteria to enter, spoiling your preserved food. Just like a leaky roof can damage a house, a faulty jar can ruin your preserved food.
Record Keeping: Tracking Your Preservation Journey
Maintaining detailed records is a key practice for any home preserver. Record the date of preservation, ingredients used, processing times, and any deviations from the recipe. This information becomes invaluable for tracking shelf life and troubleshooting any potential issues.
Meticulous record-keeping also helps you refine your techniques over time. By noting the most successful methods for specific foods, you can consistently achieve excellent results. Think of it as your personal preservation journal, documenting your progress and enhancing your expertise.
Recognizing Spoilage: Early Detection is Key
Even with meticulous practices, spoilage can occasionally occur. Knowing how to identify spoilage signs is critical. Look for bulging lids, unusual odors, mold growth, or cloudiness in liquids – all signs that something isn't right.
If you notice any of these signs, discard the food immediately. Don't taste or try to salvage it. Caution is always best when it comes to food safety.
Avoiding Common Preservation Mistakes: Tips for Success
Here's how to avoid some frequent preservation pitfalls:
-
Overfilling Jars: Leaving sufficient headspace is vital for a proper seal. Overfilling prevents a secure seal and increases spoilage risk.
-
Insufficient Processing Time: Process foods for the recommended time to eliminate harmful microorganisms. Cutting corners compromises safety.
-
Ignoring Temperature Recommendations: Maintain the correct temperature during fermentation or dehydration to prevent spoilage.
-
Improper Storage: Store preserved foods in a cool, dark, and dry environment to maintain quality and extend shelf life.
By avoiding these common mistakes and adhering to the safety guidelines in this section, you'll greatly improve the safety and shelf life of your preserved foods, enjoying the rewards of home preservation with peace of mind.